Live kernel patching
Your company is in a period of high volume business critical activity and cannot afford the risk of taking down either of the HANA hosts for maintenance however you have just been advised of a critical kernel vulnerability.
RHEL versions 7.7 and 8.1 introduced live kernel patching functionality via kpatch for all subscriptions, which allows for select critical and important security kernel patches to be applied without a reboot.
Overview
In this lab exercise, you will identify vulnerable systems and automatically apply live kernel patches on your lab instances.
Logging into Tower
Your Ansible Tower instance url and credentials were supplied to you on the page created for this workshop.
Identifying Vulnerable Systems
For your lab environment, there are 2 smart inventories are pre-created:
- RHEL 8 - (List of all RHEL 8 systems)
- RHEL 8 - Vulnerable (List of all vulnerable systems)
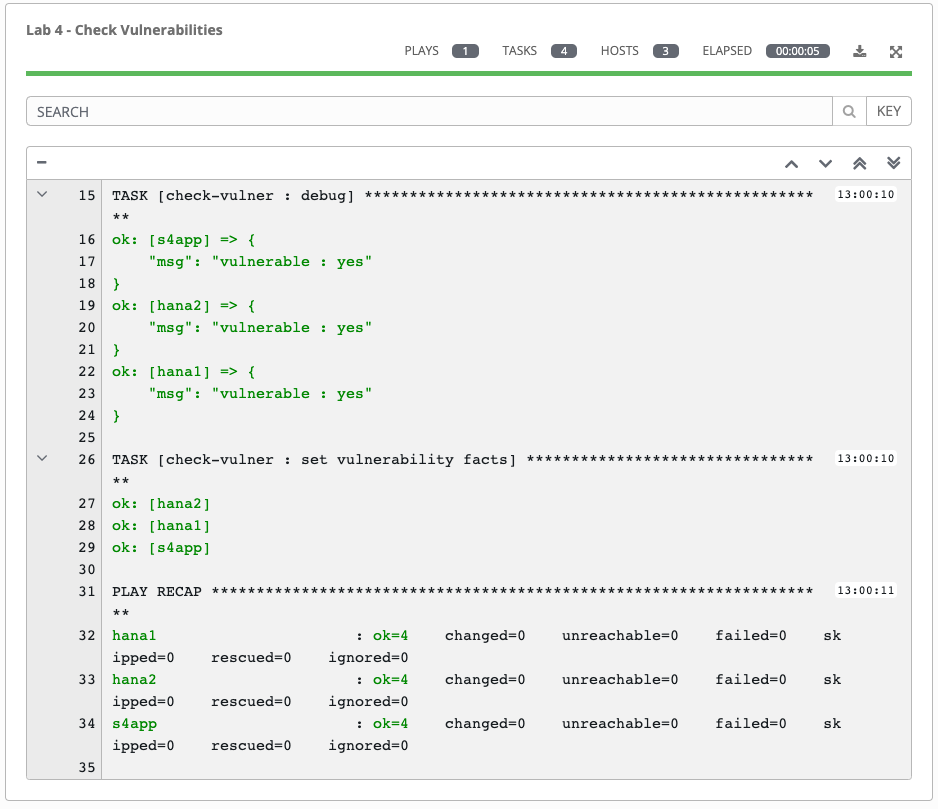
First, run Lab 4 - Check Vulnerabilities job template to identify any vulnerable systems.
Step 1:
Select TEMPLATES
Step 2:
Click the rocketship icon ![]() for the
Lab 4 - Check Vulnerabilities
for the
Lab 4 - Check Vulnerabilities
Step 3:
When prompted, click NEXT in OTHER PROMPTS dialog.
Step 4:
In SURVEY tab, select cve_2019_11135
Note: For more information on this vulnerability: https://nvd.nist.gov/vuln/detail/CVE-2019-11135
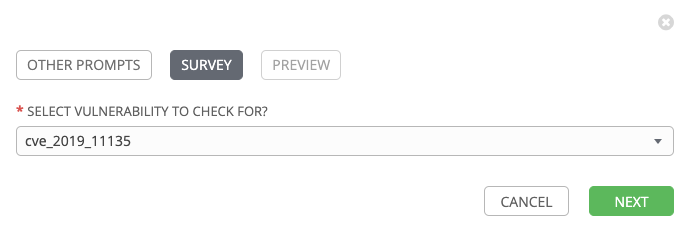
Step 5:
Select NEXT and preview the inputs.
Step 6:
Select LAUNCH 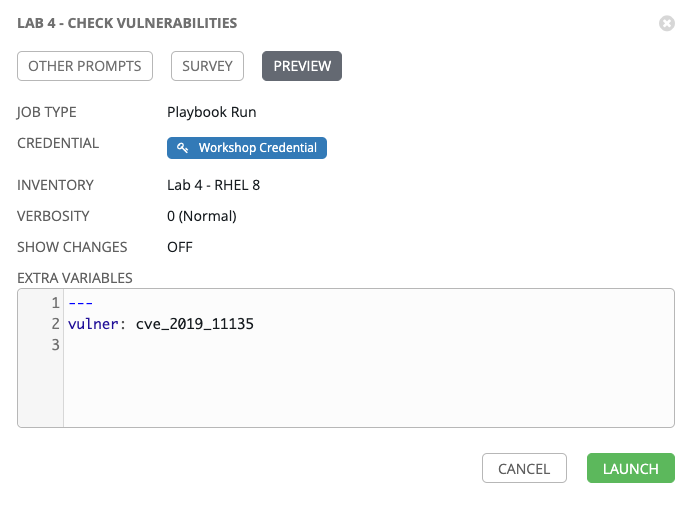
Step 7:
Sit back, watch the magic happen
One of the first things you will notice is the summary section. This gives you details about your job such as who launched it, what playbook it’s running, what the status is, i.e. pending, running, or complete.
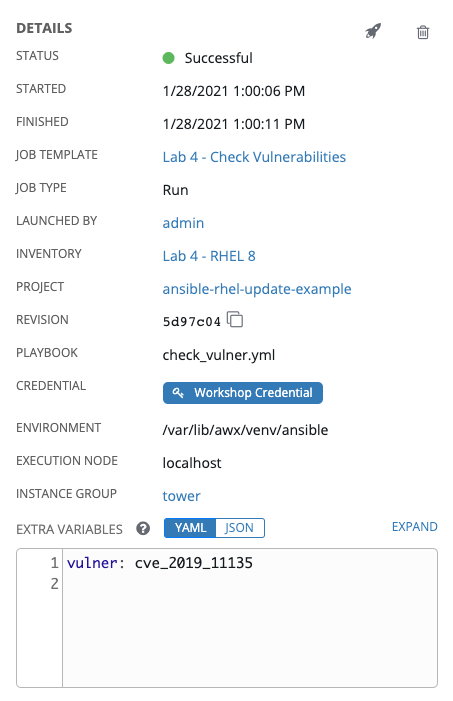
Next you will be able to see details on the play and each task in the playbook.
Step 8:
When the job has successfully completed, you should see which systems are vulnerable (yes/no).
Validating Smart Inventory
Step 1:
After running the job template, results will be now reflected in the inventory RHEL 8 - Vulnerable.
Navigate to INVENTORIES
Step 2:
Click Lab 4 - RHEL 8 - Vulnerable.
Step 3:
Review SMART HOST FILTER field, it’s only listing RHEL 8.1 vulnerable systems.
Step 4:
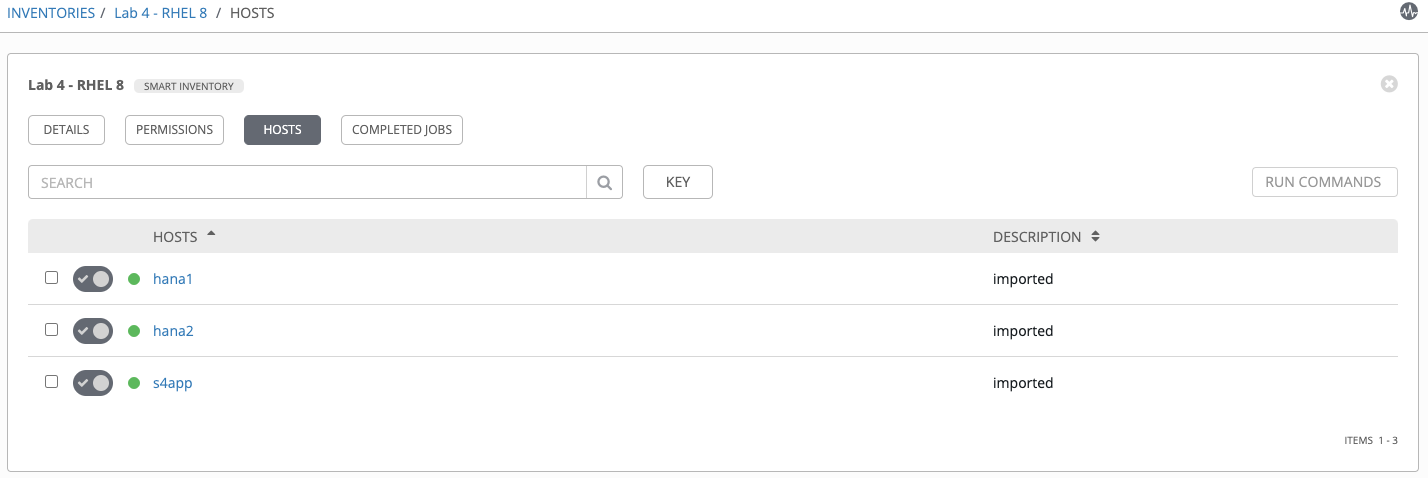
Click the HOSTS tab and review the system(s) listed.
Fixing Vulnerable Systems
Now that you verified the vulnerable systems, you can run the Lab 4 - Live Kernel Patch job template to update those systems without distrbuting the services running.
Step 1:
Select TEMPLATES
Step 2:
Click the rocketship icon ![]() for the
Lab 4 - Live Kernel Patch
for the
Lab 4 - Live Kernel Patch
Step 3:
When prompted, click NEXT in OTHER PROMPTS dialog.
Step 4:
In SURVEY tab, select cve_2019_11135
Note: For more information on this vulnerability: https://nvd.nist.gov/vuln/detail/CVE-2019-11135
Step 5:
Select NEXT and preview the inputs.
Step 6:
Click LAUNCH.
Step 7:
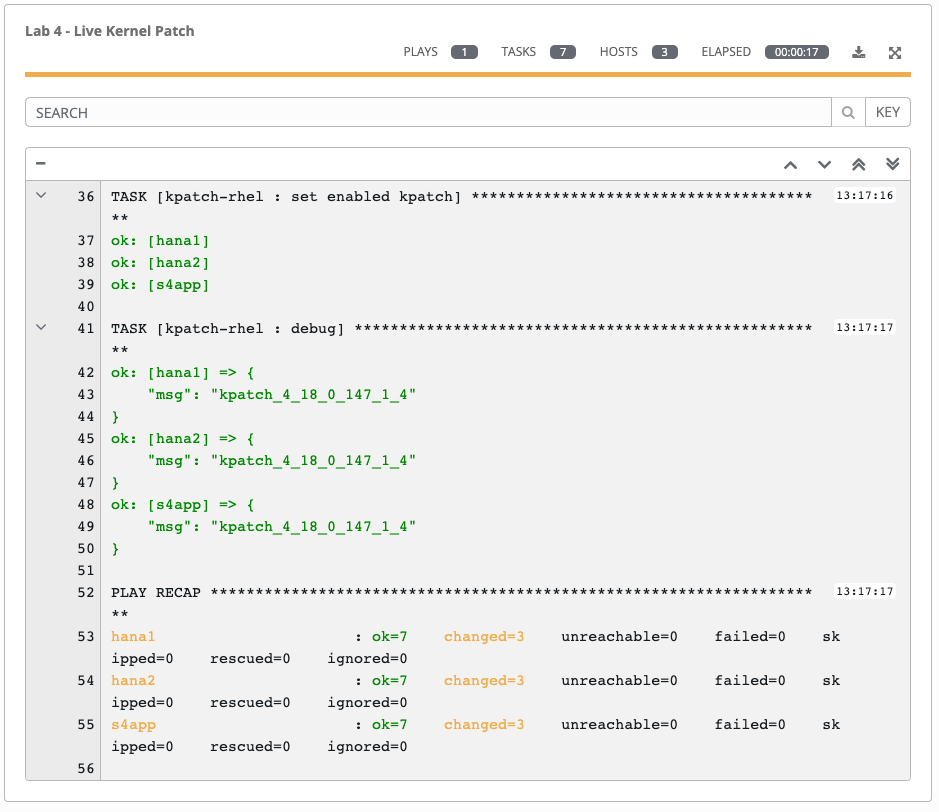
When the job has successfully completed, you should see the systems that are patched in the details view:
Re-checking Vulnerable Systems
After running the Lab 4 - Live Kernel Patch job template, all systems should patched and vulnerabilities should be gone.
Step 1:
Select TEMPLATES and re-run Lab 4 - Check Vulnerabilities
Step 2:
After answering the survey question and running, validate that systems are not vulnerable anymore.
Step 3:
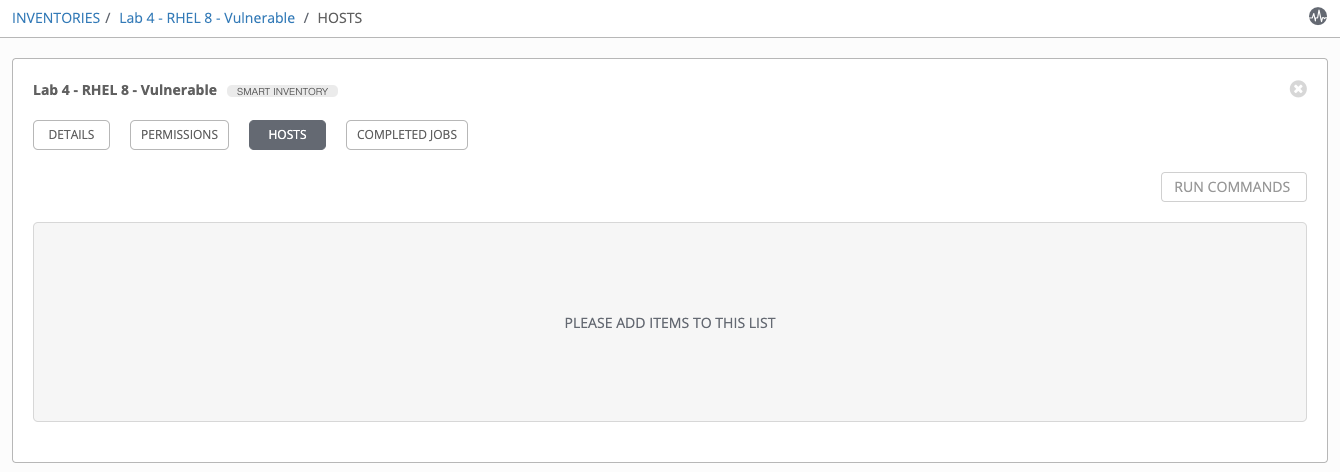
Navigate to INVENTORIES > Lab 4 - RHEL 8 - Vulnerable and verify that no hosts are listed in the dynamic inventory.
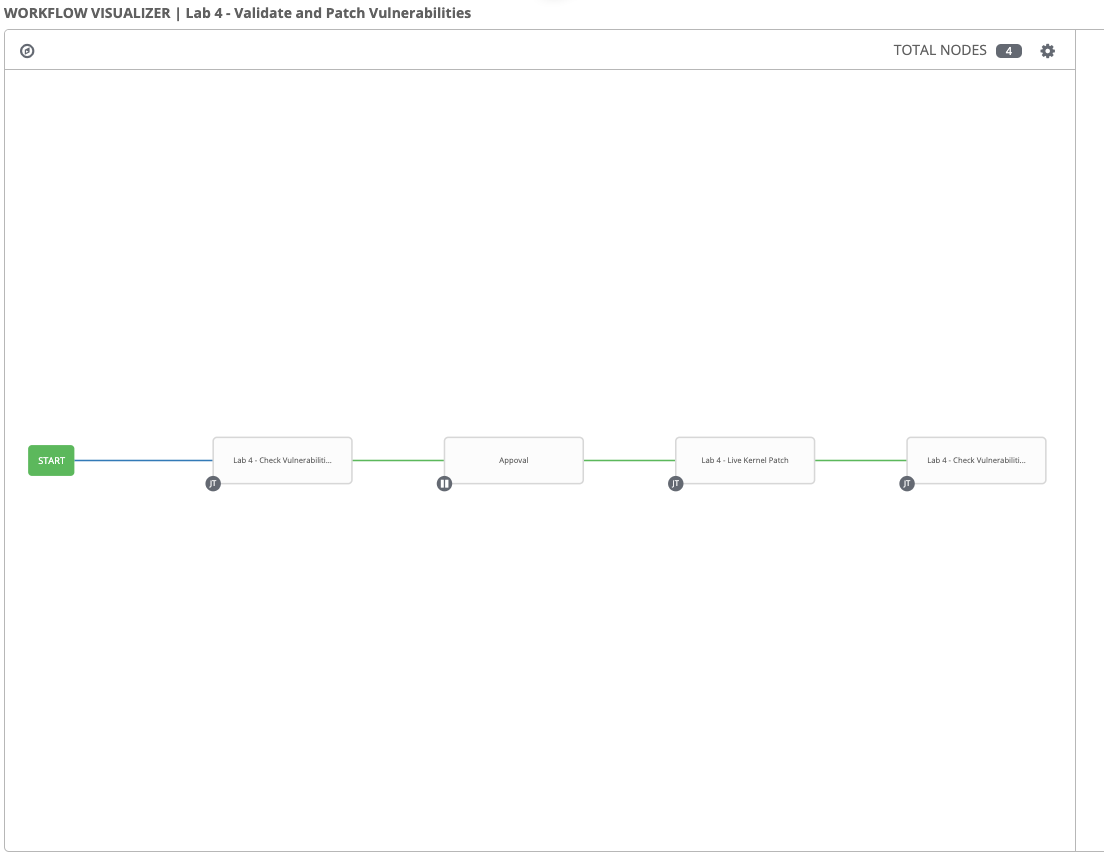
Challenge Exercise: Putting it all together
Wouldn’t it be nice if you could put this all together in a nice Workflow (potentially with an approval step) so that you wouldn’t need to run through individual job templates manually.
In this exercise you will create a workflow template for checking, fixing and validating vulnerable systems.
Step 1:
Navigate to TEMPLATES.
Step 2:
Click the  icon and select Workflow Template
Step 3:
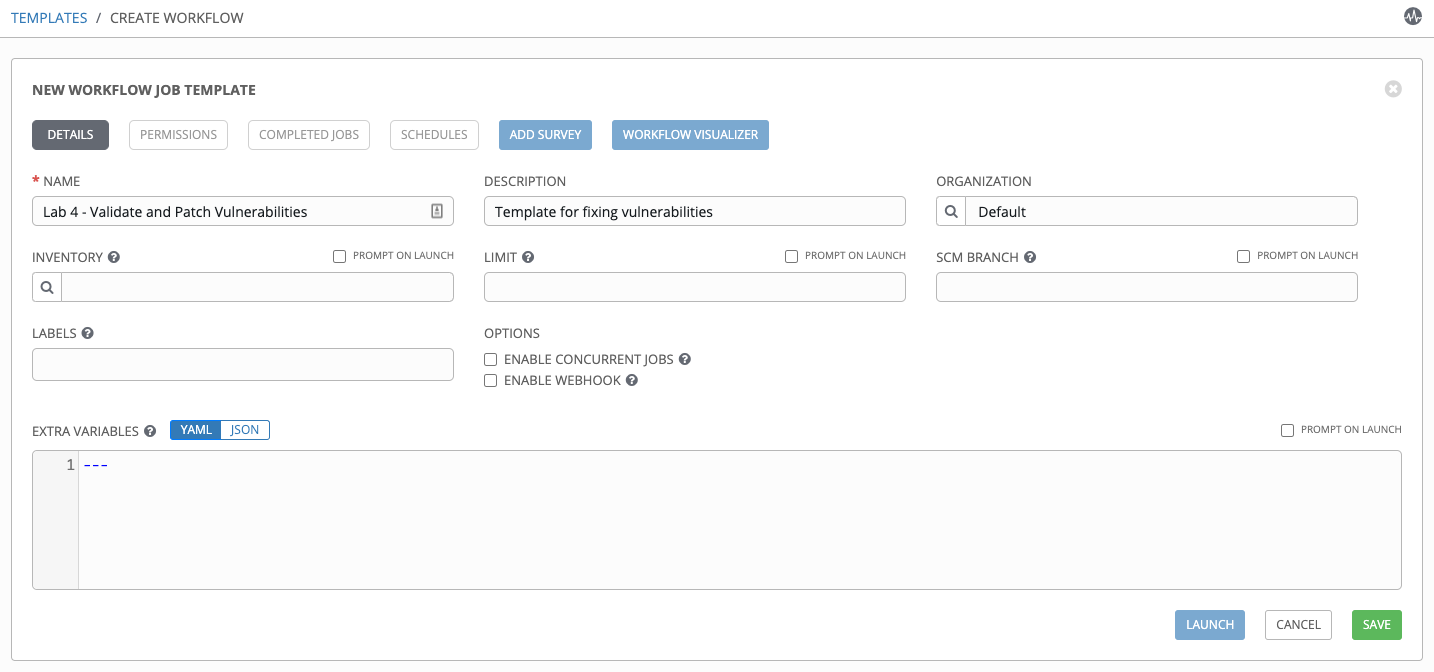
Complete the form using the following values (leaving other fields blank):
| Key | Value | Note |
|---|---|---|
| Name | Lab 4 - Validate and Patch Vulnerabilities | |
| Description | Template for fixing vulnerabilities | |
| Organization | Default |
Step 4:
Select SAVE 
Step 5:
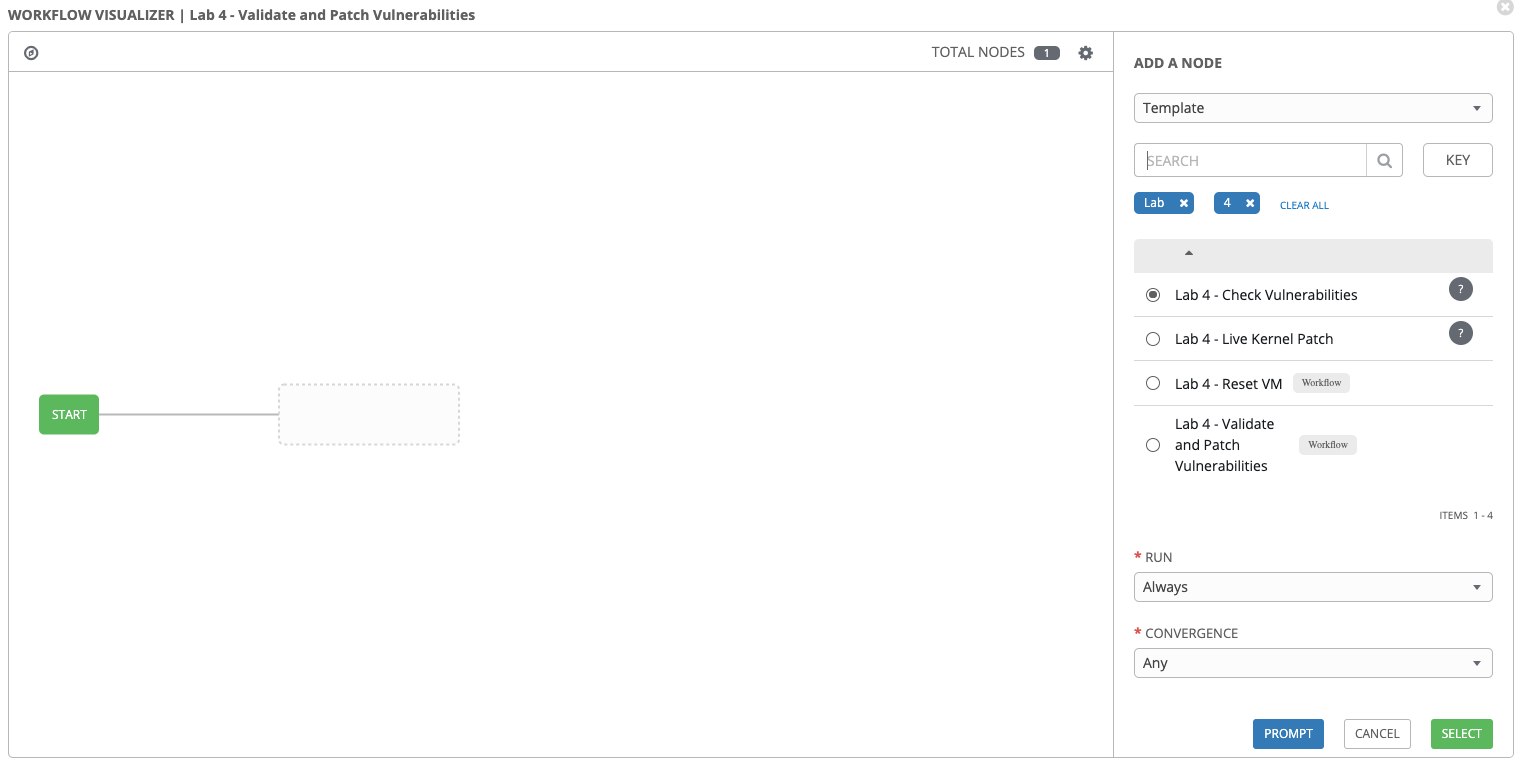
You will see and empty canvas where you can start including job templates.
Select START 
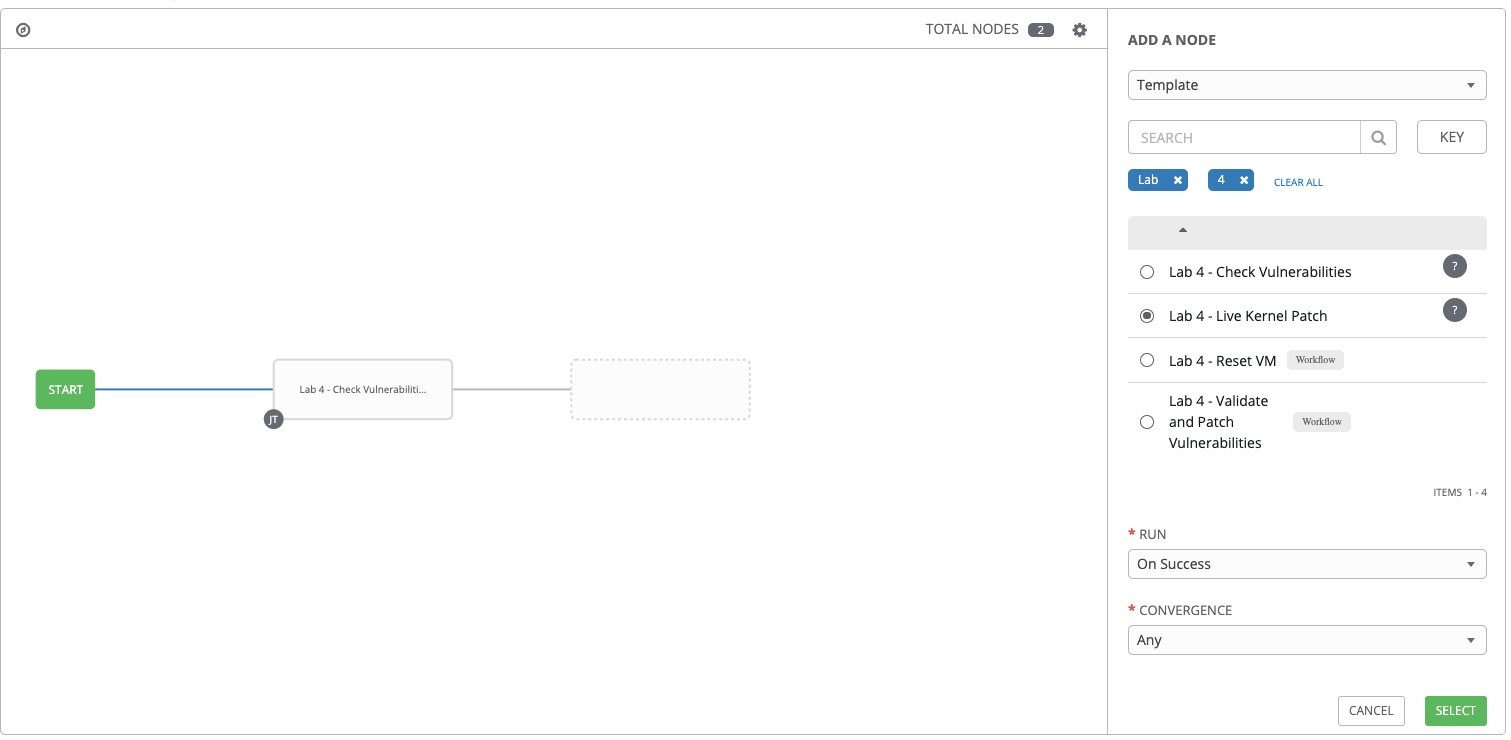
Step 6:
In ADD A NODE dialog box on the right side of the window, select Lab 4 - Check Vulnerabilities
Step 7:
Click PROMPT 
Step 8:
When prompted, in SURVEY tab, select cve_2019_11135
Select NEXT and preview the inputs.
Step 9:
Select CONFIRM 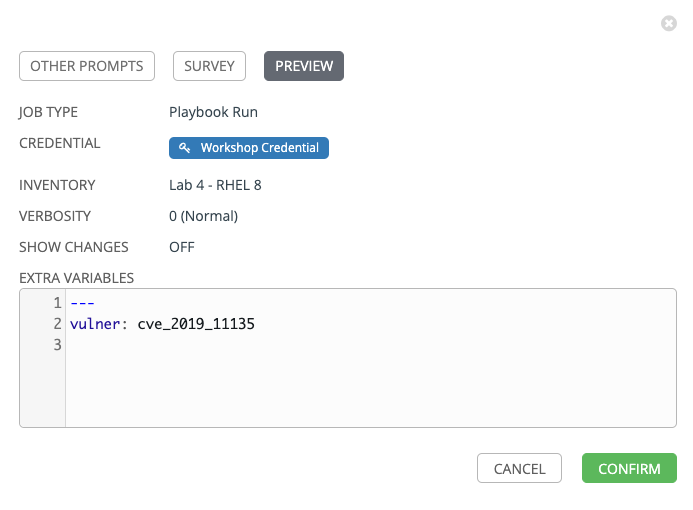
Step 10:
Click SELECT 
Step 11:
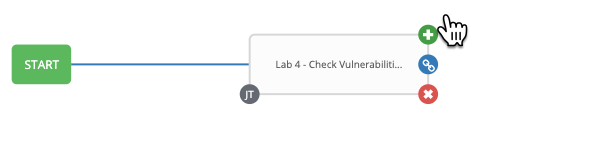
Hover over the newly added Lab 4 -Check Vulnerabilities box and click 
Step 12:
In ADD A NODE dialog box on the right side of the window, select Lab 4 - Live Kernel Patch
Step 13:
Click SELECT
Step 14:
Repeat steps 6-10 and add Lab 4 - Check Vulnerabilities again as the 3rd node.
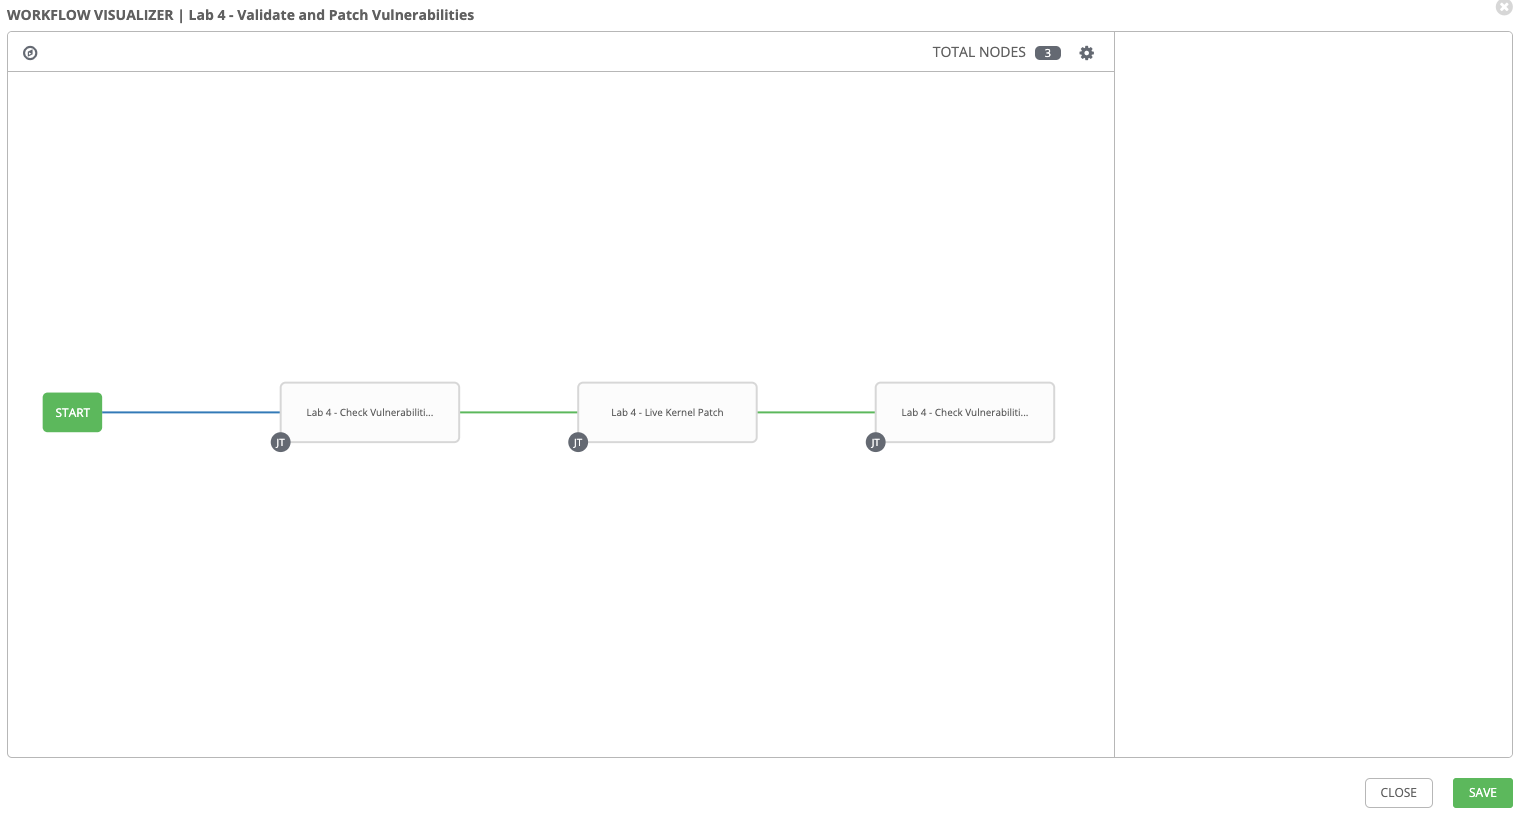
Step 15:
Select SAVE
Step 16:
Back on the main Workflow Template page, select SAVE
again.
Running Validate and Patch Vulnerabilities Workflow Template
Now you can test the Workflow template that you just created.
Step 1:
Select TEMPLATES
Step 2:
Click the rocketship icon ![]() for the
Lab 4 - Validate and Patch Vulnerabilities
for the
Lab 4 - Validate and Patch Vulnerabilities
Alternatively, you can click LAUNCH  on the Workflow Template view.
Step 3:
After you launch the workflow template, you will see the top-level view:
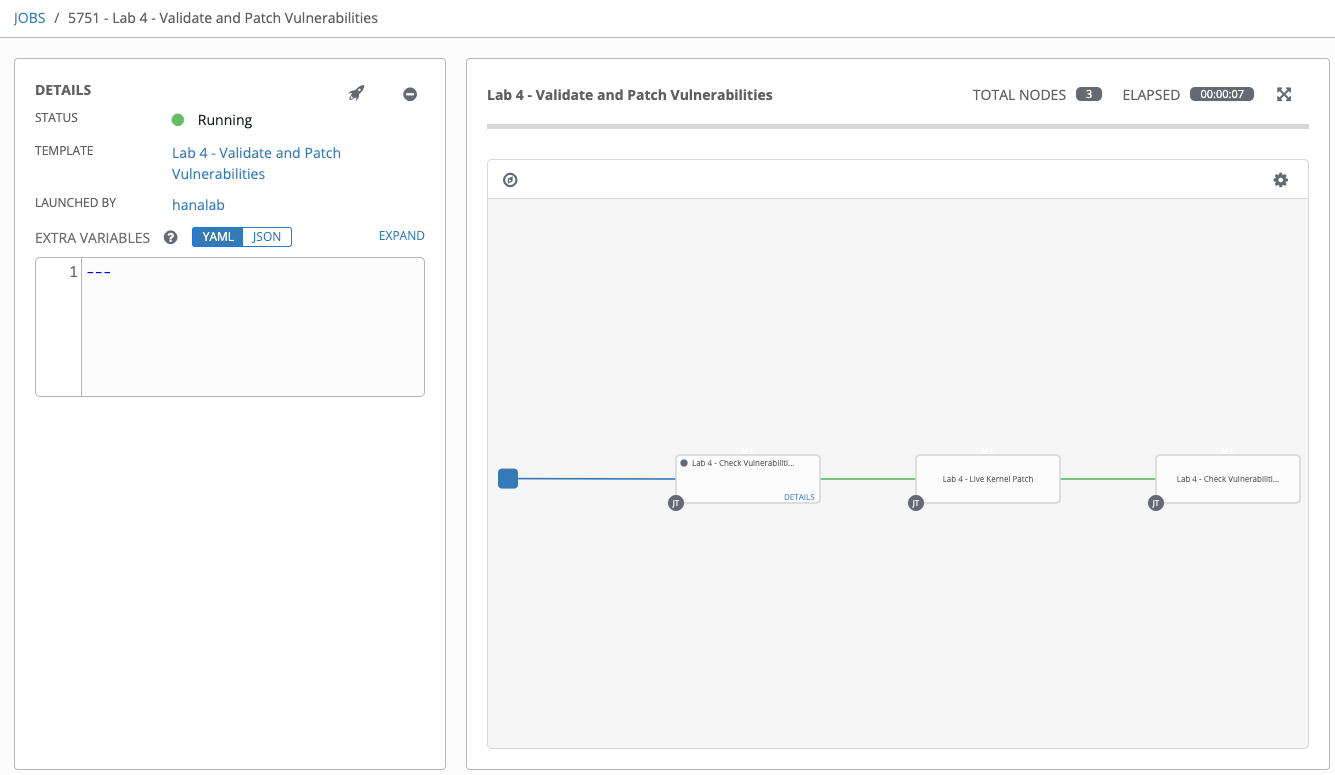
You can click “Details” on individual nodes to see the detailed view of jobs as the nodes gets run
Step 4:
Review the details of each node, are the results as expected? Any vulnerability found?
Hint: Vulnerabilities were previously fixed on all nodes.
Challenge Exercise: Add approval step in the workflow
In this challenge exercise, you will add an approval node in the workflow and re-run.
Hint: You can add an approval node to the canvas by selecting ‘Approval Node’ from the drop down as opposed to ‘Template’.
Example solution